Showing posts with label Chocolate. Show all posts

Tuesday, November 15, 2011

Excuse me.... is this where I get my chocolate fix?

CHOCOLATE.  Researchers have found that eating chocolate, the number one food craved by American Women, actually causes the brain to release endorphins ( this is the chemical in our brain that makes us feel good).  Beyond that, dark chocolate is actually one of your heart's "super foods" in that you should eat 1 oz. every day.  Dark Chocolate (no milk chocolate though...sorry!) is proven to lower blood pressure and is loaded with antioxidants which help to gobble up free radicals, destructive molecules that are implicated in heart disease and other ailments.  When I saw this recipe for Jacques Torres' Mudslide Cookies, it had me salivating first and then, in a roundabout manner, thinking it could kind of be good for me too.  I love chocolate in any form, dark or milk, and in any combination (my favorite is with peanut butter!).  So, I decided that this cookie would be a great treat for my roommates and colleagues....and me, too.


The Jacques Torres 
Chocolate Mudslide Cookies

1/2 cup plus 3 tablespoons all-purpose flour
1 tablespoons baking powder
1/8 teaspoon kosher salt
6 ounces unsweetened chocolate
16 ounces bittersweet chocolate
6 tablespoons unsalted butter, cubed and room temperature
2 1/4 cups plus 1 tablespoon sugar
5 eggs, room temperature
1 1/4 cups plus 1 tablespoon walnuts, chopped
16 ounces bittersweet chocolate, chopped
fleur de sel or sea salt, for sprinkling
*parchment paper, for lining the baking sheets


Preheat your oven to 325 degrees F and line your first baking sheet with parchment paper (I usually spray a little cooking spray on the pan before I lay down the parchment paper to make it stay on easier). 
Blend together all of your dry ingredients and set aside (the flour, baking powder, and salt). Next, in a medium sauce pan, melt together the 6 ounces of unsweetened chocolate and the 16 ounces of bittersweet chocolate over medium-low heat, stirring frequently to prevent burning. Set aside to cool.

Now, stir together the butter and sugar until it has the texture of wet sand. Add in the eggs, one at a time, using a mixer on low, scraping down the sides of the bowl as necessary. Next, add in the flour mixture, and mix until just mixed and then beat in the melted chocolate, until just combined. (Note: the dough will seem too wet at this point, but don’t worry! It’ll come together!)

Chop your walnuts and additional 16 ounces of bittersweet chocolate, and fold them into the batter.  Use a a tablespoon  to scoop up the dough and drop the dough onto the baking sheets , then sprinkle with a bit of sea salt (trust me.....do it!). Bake at 325 degrees F on a regular setting for 12-15 minutes (14 minutes in my oven did the trick). Allow to cool completely before removing from the sheets.


After eating way too much dough, I decided to try just one.  The verdict?  It's a very good, rich cookie (especially for any chocoholics out there) and tastes more on the dark chocolate side of things which I really liked.  But - yes, there is a but - I actually found it to be almost too rich.  Even sprinkling the little bit of salt over the cookie couldn't cut through the incredible decadence of this cookie.  So, eater beware!  I know while you are making this cookie you will want to eat all the dough you can and eat cookies in a manner that could rival the Cookie Monster, but take it from me, please refrain.  One is definitely enough (my stomach can prove it).  Plus, dark chocolate is good for you only in moderation, so take a page from Warren G's playbook (name drop!), and regulate yourself.  You'll thank me later.

Wednesday, January 19, 2011

Peanut Butter Pie...with Chocolate Sauce. YUM.

I know what you are thinking....again with the Chocolate and Peanut Butter combination?  Here's the thing: it is a scientific fact that one person can never consume too much of the chocolate and peanut butter combo.  That fact may or may not be true, but seriously....Peanut Butter Pie is one of my favorite pies.  After you try this recipe (that is really easy too!), this will become one of your favorites too.

PEANUT BUTTER PIE WITH CHOCOLATE SAUCE

Hot Fudge Sauce:
•    1/3 cup heavy cream
•    1/4 cup light brown sugar
•    1/4 cup light corn syrup
    •    2 tablespoons unsweetened cocoa powder
    •    1/8 teaspoon table salt
    •    2 teaspoons vanilla extract
    •    4 ounces semisweet chocolate chips   
Peanut Butter Pie:
    •    8 ounces cream cheese, at room temperature
    •    3/4 cup confectioners' sugar, plus 2 tablespoons, divided
    •    3/4 cup creamy peanut butter, at room temperature
    •    1 cup heavy whipping cream
    •    1 teaspoon vanilla extract
    •    2 ounces shaved milk chocolate
    •    Chopped peanuts, optional
    •    1 (9-inch) baked chocolate cookie pie crust

For the sauce: Add the cream, brown sugar, corn syrup, cocoa powder, salt, and vanilla extract to a heavy-bottomed saucepan and turn it up to medium heat (if the saucepan isn't heavy-bottomed, then turn it slightly cooler than medium heat so the chocolate doesn't burn). Reduce the heat to a simmer and add the chopped chocolate.  After that, stir the sauce continuously until the chocolate is melted and it has thickened, roughly 3 to 4 minutes. Take the pan off the burner, and let the sauce cool for 10 minutes before serving.

For the pie: In a large bowl, combine the cream cheese, confectioners' sugar and the peanut butter, and beat with an electric mixer until the mixture is light and fluffy (about 3-4 minutes).
In a separate bowl, whip the heavy cream with an electric mixer on high until thick and light. Add the remaining 2 tablespoons of confectioners' sugar and vanilla extract. Once you have added those two ingredients, continue to whip the cream until stiff peaks form.  Next, take the whipped cream and pour into the peanut butter mixture, and using the electric mixer, combine the two together for about 1-2 minutes. Pour the batter into the pie shell, sprinkle with the shaved milk chocolate and freeze for 4 hours.

If desired, serve with the hot fudge sauce, but you can also add whipped cream, and chopped peanuts if you want to make it even more decedent!

Overall, this pie is great.  It is rich and light all at the same time, and each bite is very smooth.  This pie is great any time of year and is super easy to make.  Because there is no baking, I whipped up two pies and threw them in the freezer in less than 30 minutes (clean up included!).   Am I obsessed with the Chocolate and Peanut Butter combo?  Absolutely.  But, maybe next time I will make something that doesn't include those two ingredients.  Maybe.

Thursday, January 13, 2011

Chocolate and Peanut Butter....ASSEMBLE!

I have said it before, and I will say it again:  there is no better combination than chocolate and peanut butter.  I think it is safe to say that I would eat just about anything that involves this combination (no, that wasn't an invitation to see what I'll eat, so don't ask).  I recently found this recipe on a blog and have been dying to try it, but I haven't just because I knew exactly how rich these bad boys must be.  I was right.  
Needless to say, I found a reason to make them when recently one of my coworkers found out the gender of her baby (a baby boy....congrats!), and I thought these cupcakes were perfect with which to celebrate.  I give to you....Chocolate and Peanut Butter Cupcakes, or as I like to call them, Heaven.


Chocolate Peanut Butter Cupcakes

1 1/2 cups all-purpose flour
1/3 cup unsweetened cocoa
1 cup brown sugar
1 tsp baking soda
1/4 tsp salt
1/3 cup vegetable oil
1 cup hot water
1 Tbsp White Vinegar
1/2 tsp vanilla extract
1 egg
1 - 8 ounce package cream cheese, softened
3/4 cup Natural Creamy Peanut Butter
1/3 cup White Sugar
1/3 cup Confectioner's Sugar
3/4 cup Chocolate and Peanut butter chips, divided


First, start off by preheating your oven to 350 degrees.  Take a muffin tin, line them with muffin liners, and set it aside.  In a large bowl, whisk together flour, cocoa, brown sugar, baking soda and salt.  Add oil, water, vinegar and vanilla to the dry mixture, stirring it just until smooth.  After that, take your chocolate and peanut butter chips, and stir them into the batter.

Next, in another large bowl, beat together the egg, cream cheese, peanut butter and sugar with an electric mixer on medium speed (I did this for about 2 minutes).  Add in the confectioner's sugar next and beat this until creamy.
Now comes the fun part:  spoon 1 level tablespoon of chocolate batter into the bottom of each cup.  Next, take the peanut butter mixture and evenly spread 1 level tablespoon on top of that.  To top it off, take another tablespoon of the chocolate batter and fill it up to the top.  With the remaining chocolate and peanut butter chips, sprinkle over the tops of each of the cupcakes. 

You will want to bake the cupcakes about 25 to 30 minutes or until toothpick inserted in center comes out clean (Do not over bake!  You want the cupcake to still be soft and squishy-ish or else they will become dry and harder than rocks).  Let the cupcakes cool in pan for about 15 minutes.  Lastly, remove the cupcakes from the pan to cool on a wire rack for another 15 minutes.  These can be served warm or cool, but seriously....the warm ones were so good (you will just need a glass of milk).

I think the best part about this cupcake is the inside: it quite literally is a simple peanut butter cheese cake, so it gives it a delicious, smooth taste to it while complimenting the entire dense cupcake.  No matter what you do, these cupcakes really do look like something you would see in a professional bakery, even though it doesn't take that long to whip up.

Seriously....is there a better combination out there?  I really think not.

Sunday, November 14, 2010

Chocolate and Peanut Butter......is there anything better?

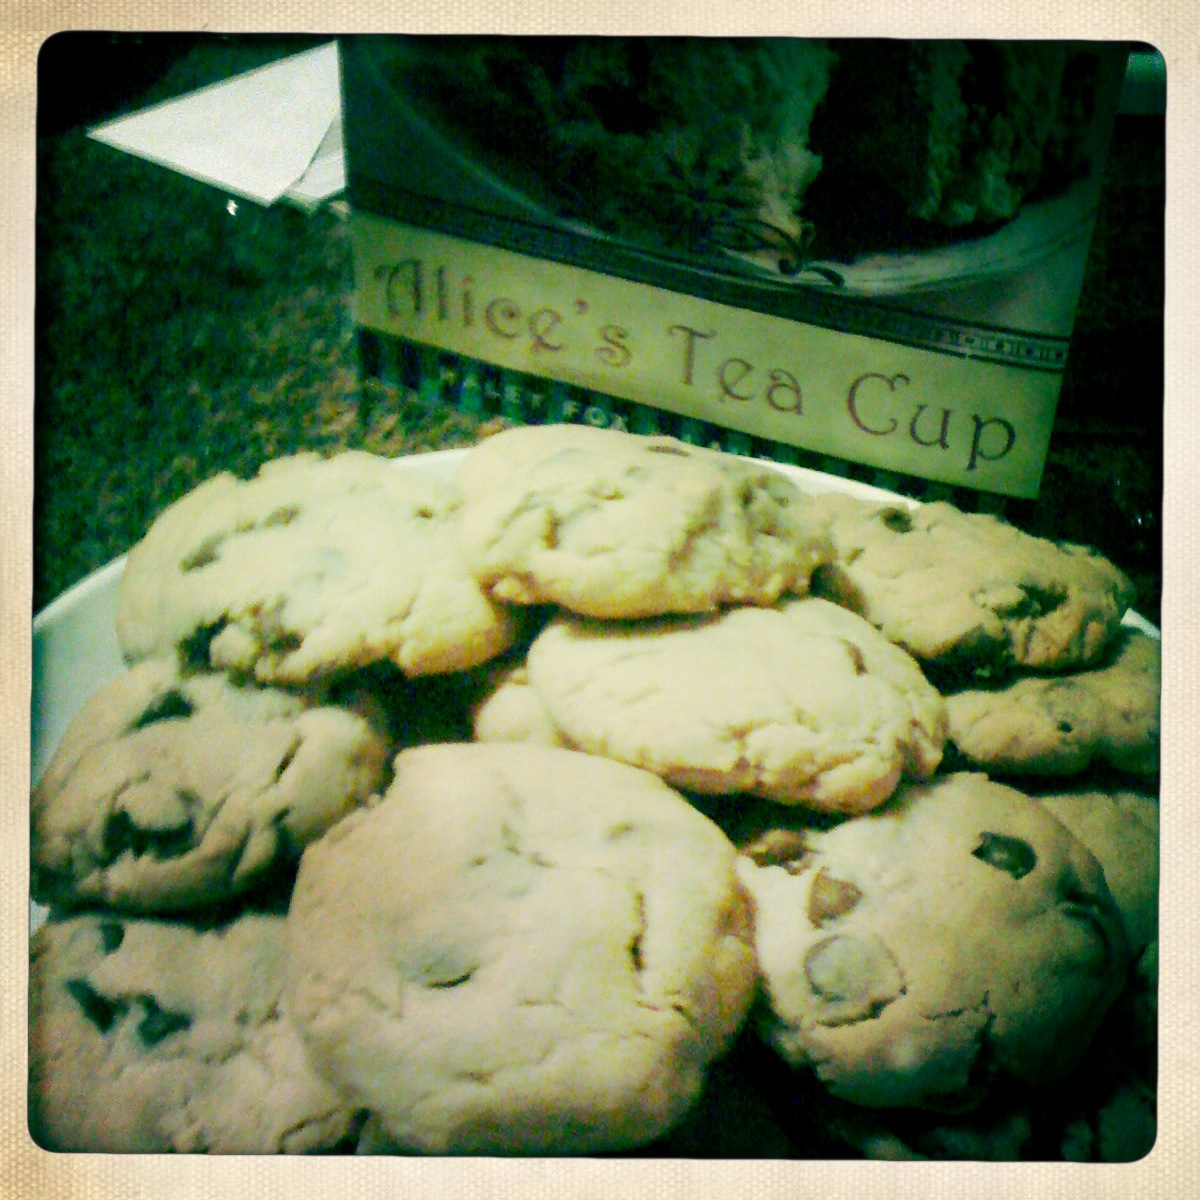
My friend Becca gave me this amazing cook book recently, and I have been dying to try all of the recipes.  The cook book is made by the individuals who own Alice's Tea Cup here in New York City, and let's just say they know what they are doing.  There are so many amazing recipes, but I wanted to start off with just a simple cookie recipe.  I don't think there is anything better than chocolate and peanut butter together, and so when I came across the Peanut Butter Chocolate Chip Cookies, I knew we had a winner.  I brought all of my equipment over to my friend's apartment so that I could bake, and so the ladies (and gentleman) who came over for Family Night got a special treat!


Peanut Butter Chocolate Chip Cookies
3 C. Flour
1 tsp. Baking Soda
1 tsp. Salt
2 sticks Butter (room temperature)
1 C. White Sugar
1 C. Dark Brown Sugar (firmly packed)
2 Eggs (room temperature)
1 tsp. Vanilla Extract
2 C. Creamy Peanut Butter
2 C. Chocolate Chips (I used milk chocolate, but semi-sweet would be delicious too!)

Preheat the oven to 350 degree.  To start, you want to combine all of the dry ingredients.  In a bowl pour in the flour, baking soda, and salt; set aside.

Next comes the wet ingredients.  Use a mixer to cream together the butter and sugar in a large bowl (this is the key to any good cookie, so make sure to cream these together for at least 3 minutes!).  Add the eggs, mixing them into the mixture one at a time, and then add the vanilla and beat until smooth.  Add in the dry ingredients a little at a time, mixing as you go until everything is incorporated.  Add the peanut butter and mix until it is creamy.  Next, stir in the chocolate chips with a spoon.

Depending on how large you want to make the cookies will dictate the cook time.  I usually take some dough into my palm and create a ball that fits into my palm, and then flatten them out into thick discs.  With this size cookie, I baked them at 12 minutes because I don't like overly done cookies, but you can bake them up to 14 minutes if you want them crispier.  With this cookie, you want to pull them out of the oven and let them cool directly on the baking sheet so that they don't crack and crumble. 

This cookie was really good:  it had a delicious flavor and was  soft and moist as well.  The only way to make this cookie even better is to make sure that you eat them with a cold glass of milk!  The best part about this recipe is that if you want just plain peanut butter cookies, you just don't add the chocolate chips!  I've said it once and I will say it again....peanut butter and chocolate is the world's best combination.

Saturday, September 18, 2010

Annie Lou Unleashed in the City....

Since this blog is still so new, I figured it would be a great time to unleash my special recipe upon the bustling metropolis that is NYC. Are you ready to get baked, NYC? Buckle your seat belts.

Truth be told, this cookie isn't all that special, it is your normal chocolate chip cookie with a few twists. However, when you taste it, you will understand how amazing this is. I started making these about 6 years ago in college after doing a little trial and error baking, and have never looked back. I really liked to make these for my dad when he was still alive. He would take them hunting so that he would have a delicious treat when he was out in the cold. Dad...this one is for you.

The "Annie Lou" Cookie

2 1/2 C. Flour
1/2 C. Ground Oats (this is the secret....it gives the cookie a richer flavor than flour alone!)
1 tsp. Baking Soda
1 tsp. Baking Powder
1 tsp. Salt
2 Sticks Butter (this should be at room temperature!)
1 Cup White Sugar
1 Cup Brown Sugar
2 Eggs (these too need to be at room temperature...and this goes for whenever you're baking!)
1 tsp. Vanilla
1 package of Semi-Sweet Chocolate Chips
1/2 package Toffee Bits

Preheat your oven to 325 degrees. Take the dry ingredients (flour, oats, baking soda, baking powder, salt) and mix them together in a bowl and set aside. Next, you need to take the butter and whip the butter until it is smooth with a mixer set on medium. Next, take the sugars and cream together with the mixer on medium for about 3 minutes, scraping the sides as needed (Note: the key to any cookie recipe is to really cream the butter and sugars together for a longer period of time than you think necessary, so always do this for at least 3 minutes!). After that, crack open the eggs and throw those in the bowl along with the vanilla, and mix again until it is all thoroughly incorporated. Take the bowl with the dry ingredients and start to pour in a little bit of the mixture at a time, beating it on medium, until everything is mixed together well. Next, dump in the chocolate chips and toffee bits into the bowl and with a large spoon, stir the dough until the chips and bits are evenly distributed throughout. Spoon (or, if you are meet, wash your hands and use them instead!) the dough out onto your cookie sheets, and bake in the oven for 12-15 minutes (depending on how soft or crunchy you want them to be). Lastly, and cerntainly not least......EAT!!!!!!

I love making double batches and then putting the dough in the freezer. This is a great way to do the same amount of work, but have the ability to have freshly baked cookies whenever you want to. I just take wax paper, plop down the remainder of the dough and form it into long logs (like the shape of the tubes of slice and bake cookies), roll it up in the paper, and then throw the bags in the freezer. When you need it, you take it out, slice it off, and bake it like normal.

Is this recipe that much different than a normal chocolate chip cookie? Nope, but the taste really is amazing. The best part about this cookie is that you can dress it up how you like. Like milk chocolate chips and peanut butter chips? Go for it! You want nuts? Do it! But, just make sure you have a glass of milk to wash it all down with.

Friday, September 10, 2010

Death by Chocolate? It was worth it.

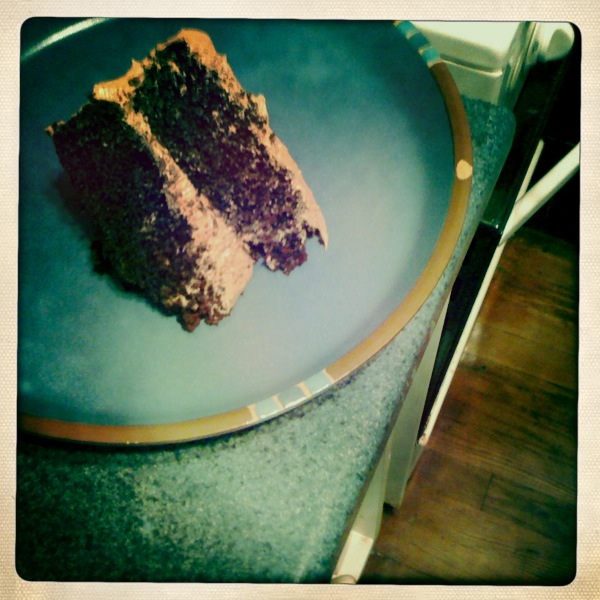
It is officially my first baked good since creating this blog. What did I choose? CHOCOLATE CAKE. Why? My friend Ashley's birthday is today, and she is so awesome that she deserves being the reason for my first blog entry. Plus, there is nothing quite like a delicious, rich chocolate cake. Here are the ingredients for the cake:

Butter (for greasing the pans)
1 3/4 C. all-purpose flour, plus more for pans
2 C. sugar
3/4 C. Cocoa Powder (I am using Hershey's)
2 tsp. baking soda
1 tsp. baking powder
1 tsp. salt
1 C. Buttermilk (remember to shake the carton to mix up the milk!)
1/2 C. Veggie Oil
2 Egg (at room temperature of course!)
1 tsp. Vanilla Extra
1 C. Freshly Brewed Coffee (this doesn't make it a mocha flavor, promise!)

This cake is really simple. First, preheat your oven to 350 degrees F. You are going to next grease your cake pans (8-inch) with a big of butter until the surface is covered and then flour them (just coat the flour with a fine dusting and tap out any excess).

Basically you mix all of the dry ingredients together in a bowl and all of the wet ingredients. In a larger bowl, sift in the flour, sugar, cocoa, baking soda, baking powder, and salt. In another bowl, combine the buttermilk, oil, eggs, and vanilla. Take an electric mixer (on low) and slowly add the wet ingredients to the dry. Next, add the coffee and stir until it is all incorporated. Pour the batter into the prepared pans, and then back 35-40 minutes (I have a gas oven, so I baked it for 35 minutes). To test, just stick a toothpick in and take out the cakes when the toothpick comes out clean. Let the cakes cool in the pan (about 20 minutes or so) and then turn them out onto a cooling rack and cool completely.

Now for the frosting.....

6 oz. Semisweet Chocolate (I am using Hershey's baking chocolate)
2 Sticks Butter (this reciped called for unsalted, but I am using salted...I like the flavor better)
1 Egg Yolk (room temperature)
1 tsp. Vanilla Extract
1 1/4 Cups Powdered Sugar
1 tablespoon instant coffee powder

First, chop up the chocolate up and put it into a double boiler (put a heat-proof bowl set over a pan of bowling water). Stir until just melted and set aside until cooled to room temperature. Next, in a bowl, beat the butter on medium-high with an electric mixer until fluffy (about 3 minutes). Add the egg yolk and vanilla and continue beating another 3 minutes. Turn the mixer to low, and then add slowly the powdered sugar, then turn it up to medium, scraping sides constantly, until smooth. Dissolve the coffee powder in 2 tsp. of hot water. On low speed, add the chocolate and coffee to the mixture and mix until blended.

Once you are finished with the frosting, place 1 layer, flat side up, on a flat plate or cake pedestal. With a knife or spatula, spread the top with frosting. Place the second later on top, rounded side up, and spread the frosting evenly on the top and sides of the cake.

This last step, the easiest, should be done in moderation: EAT!!! Then again, who has the willpower for moderation? It is CHOCOLATE after all!